Manual

Home(Spoken Content) Screen

[1] Displaying App Screen
The App Screen is displayed. You can refer to basic information about the app.

[2] Displaying Information Screen
The Information Screen is displayed. You can refer to information on how to use this screen(Home(Spoken Content) Screen).

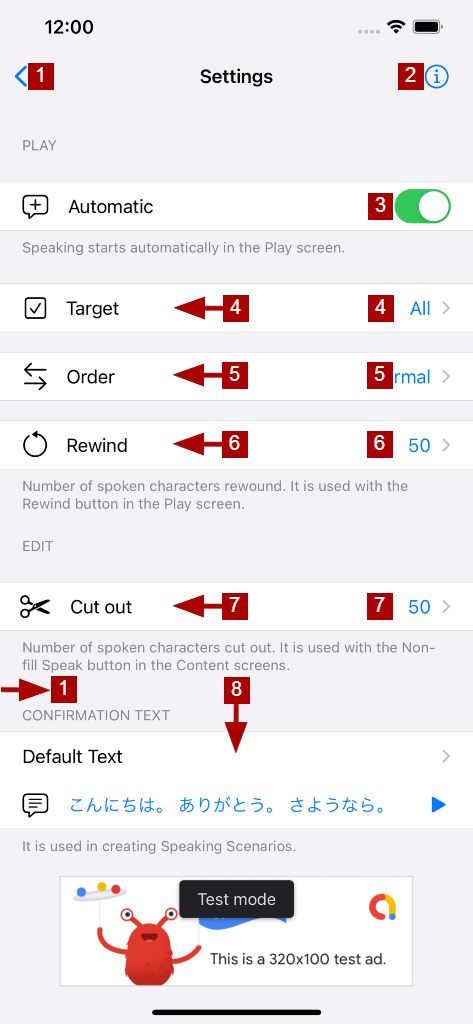
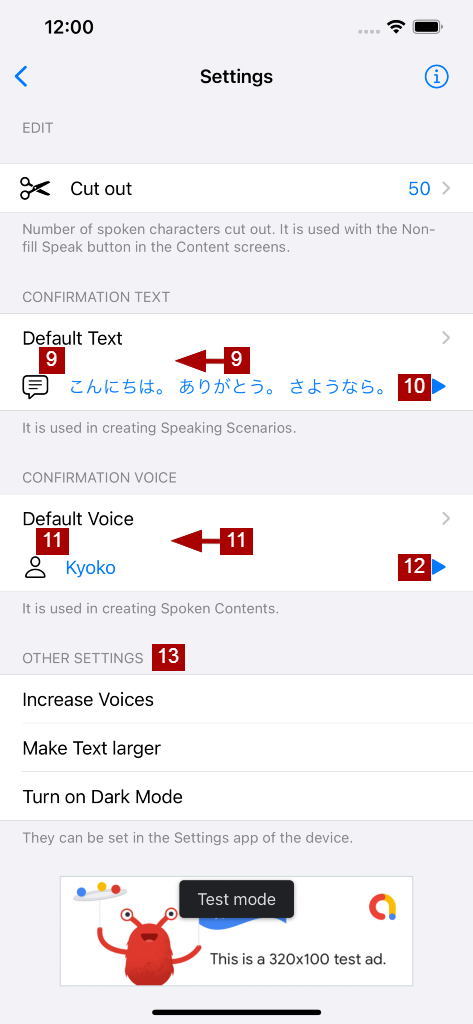
[3] Displaying Settings Screen
The Settings Screen is displayed. You can set various items of the app.

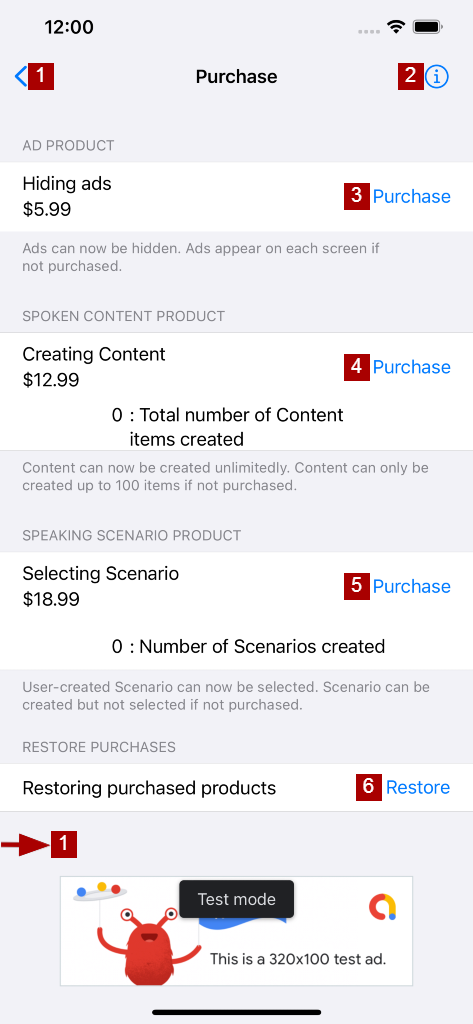
[4] Displaying Purchase Screen
The Purchase Screen is displayed. You can purchase in-app purchase products. You can also restore purchased products.

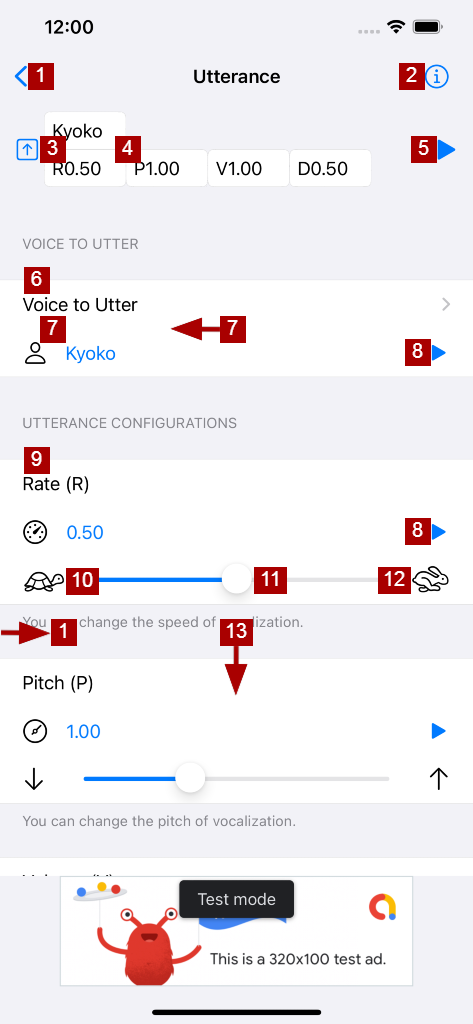
[5] Checking Speaking Function
You hear an introduction to the app. It can be used to check the speaking function (volume, mute, etc.).

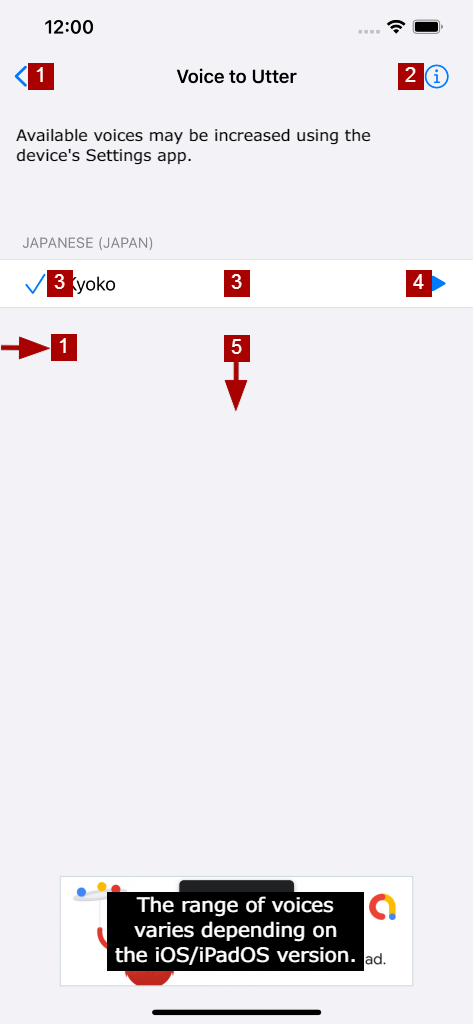
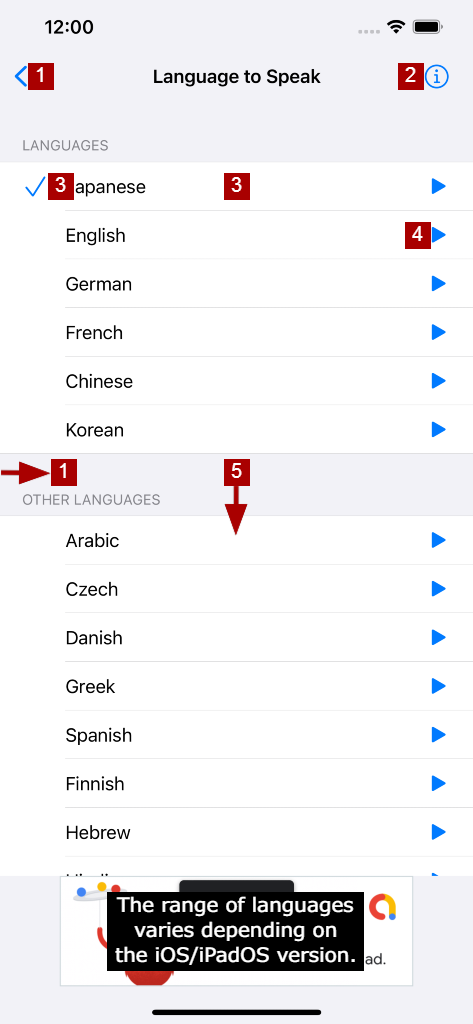
[6] Choosing Language
The Language to Speak Screen is displayed. You can choose one language you want to learn by listening.

[7] Listening to Language
You can listen to the chosen Language to Speak trially.

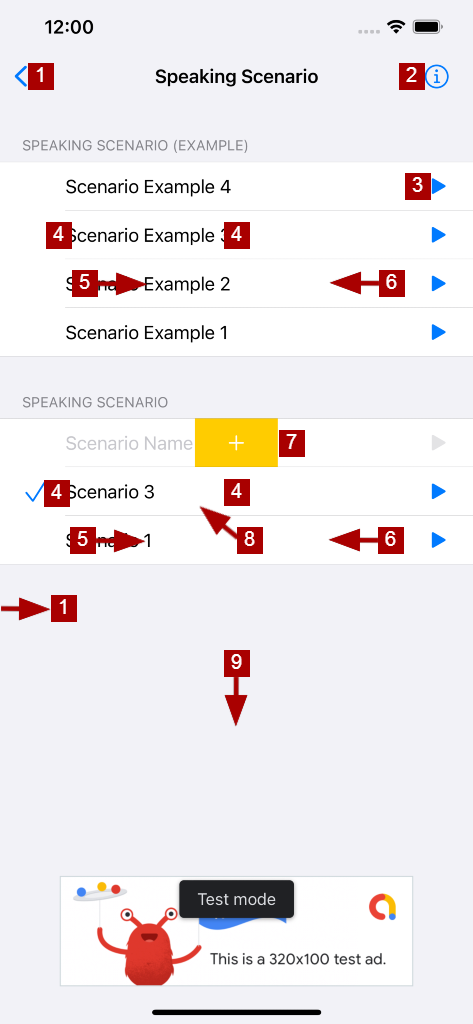
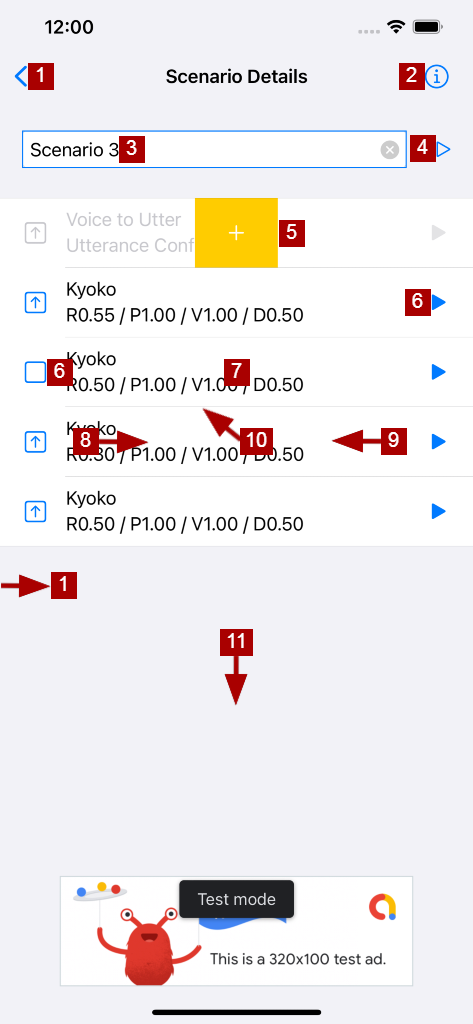
[8] Choosing, Creating Scenario
The Speaking Scenario Screen is displayed. You can choose one scenario and create scenarios for playing(speaking) Spoken Contents.

[9] Listening to Scenario
You can listen to the chosen Speaking Scenario trially. The Confirmation Text (See the Settings Screen) is spoken according to the scenario.

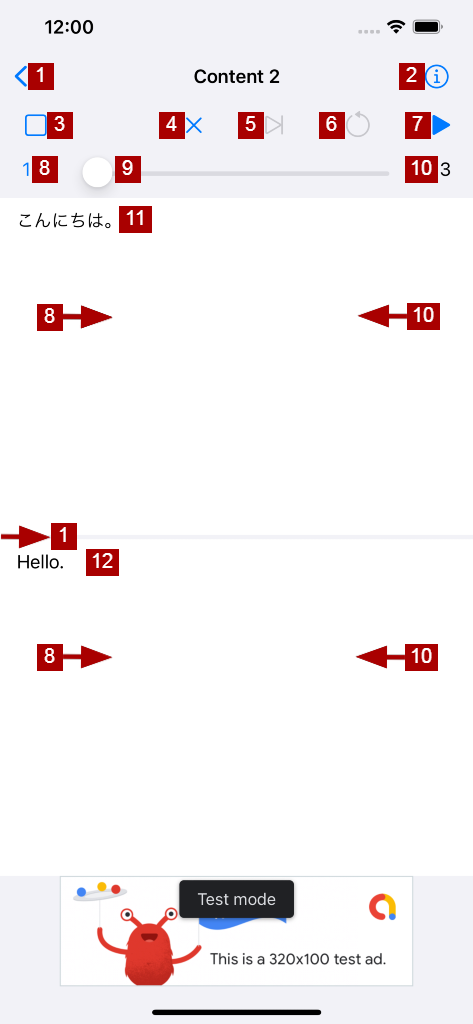
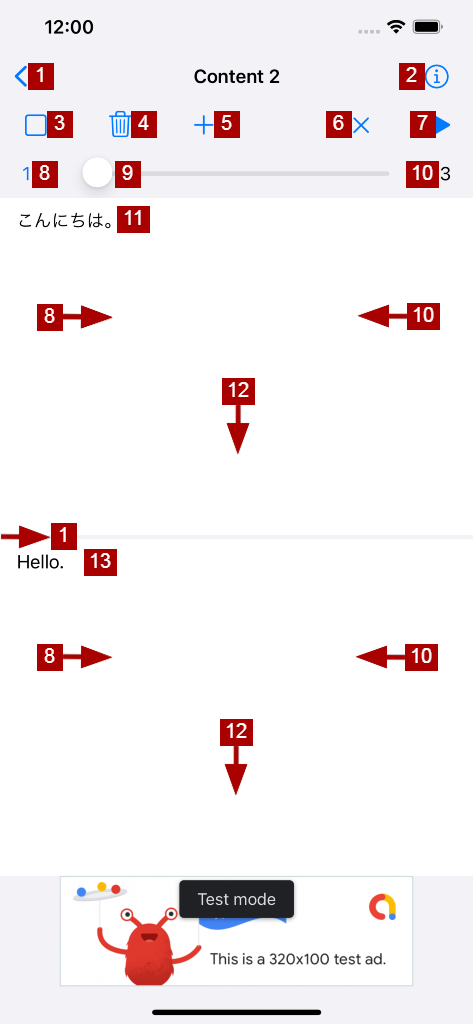
[10] Playing Content
The Content Play Screen is displayed for this Spoken Content. The content is spoken according to the chosen Speaking Scenario. This allows you to practice listening.

[11] Listening to Content(Part)
You can listen to (part of) this Spoken Content trially. The cut-out part (See the Settings Screen) of the content is spoken with the Confirmation Voice (See the Settings Screen).

[12] Deleting Content
The delete action appears for this Spoken Content. You can delete the content.

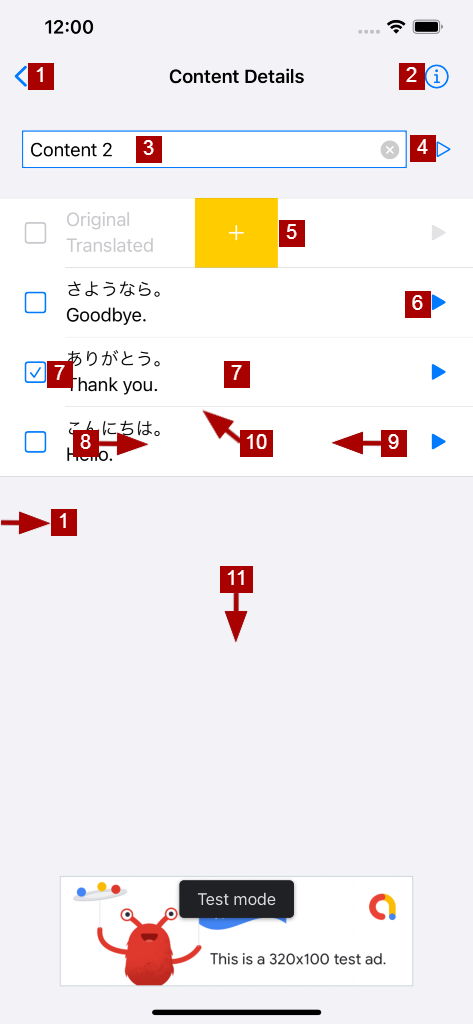
[13] Editing Content
The edit action appears for this Spoken Content. You can display the Content Details Screen for the content. You can also directly display the Content Details Screen.

[14] Adding Content
For a new Spoken Content, the Content Details Screen is displayed. You can create and add the content.

[15] Sorting Content
The order of this Spoken Content is changed. You can sort the content.

[16] Initializing Speaking Function
The speaking function is initialized. It can be used when the speaking function is out of order.

Content Play Screen

[1] Displaying Previous Screen
It returns to the previous screen(Home(Spoken Content) Screen).

[2] Displaying Information Screen
The Information Screen is displayed. You can refer to information on how to use this screen(Content Play Screen).

[3] Adding/Deleting Checkmark
The checkmark is added/deleted for the Content Item (See the Content Details Screen).

[4] Initializing Speaking Function
The speaking function is initialized. It can be used when the speaking function is out of order.

[5] Pausing/Resuming Playing
Playing(Speaking) is paused/resumed.

[6] Rewinding Playing
Playing(Speaking) is rewound by the number of characters to rewind (See the Settings Screen). It can be used when you want to check again what you missed.

[7] Performing Playing
The original part of the Content Item is spoken according to the chosen Speaking Scenario (See the Speaking Scenario Screen). If playing is set to automatic (See the Settings Screen), playing(speaking) is performed immediately after a Content Item is displayed.

[8] Displaying Previous Item
The previous Content Item is displayed. The left end of the slider shows the number of the current item.

[9] Displaying Any Item
Any Content Item is displayed. You can move the slider to jump to the item.

[10] Displaying Next Item
The next Content Item is displayed. The right end of the slider shows the total number of all items.

[11] Original Content
It is the original content. The original content is played(spoken).

[12] Translated Content
It is the translated content. The translated content is not played(spoken).

Content Details Screen

[1] Displaying Previous Screen
It returns to the previous screen(Home(Spoken Content) Screen).

[2] Displaying Information Screen
The Information Screen is displayed. You can refer to information on how to use this screen(Content Details Screen).

[3] Editing Content Name
The keyboard appears. You can edit the name of the Spoken Content. The keyboard can disappear with the done key or swipe down.

[4] Listening to Content(Part)
You can listen to (part of) the Spoken Content trially. The cut-out part (See the Settings Screen) of the content is spoken with the Confirmation Voice (See the Settings Screen).

[5] Adding Content Item
For a new Content Item, the Content Edit Screen is displayed. You can create and add the item.

[6] Listening to Content Item
You can listen to this Content Item trially. The original part of the item is spoken with the Confirmation Voice (See the Settings Screen).

[7] Adding/Deleting Checkmark
The checkmark is added/deleted for this Content Item. You can add/delete a mark indicating that the item has been learned. If the target of playing(speaking) a Spoken Content is “Other than checked” (See the Settings Screen), Content Items with the checkmark added are excluded from the target.

[8] Deleting Content Item
The delete action appears for this Content Item. You can delete the item.

[9] Editing Content Item
The edit action appears for this Content Item. You can display the Content Edit Screen for the item. You can also directly display the Content Edit Screen.

[10] Sorting Content Item
The order of this Content Item is changed. You can sort the item. Playing(speaking) a Spoken Content is performed in order from the lower Content Item to the upper Content Item.

[11] Initializing Speaking Function
The speaking function is initialized. It can be used when the speaking function is out of order.

Content Edit Screen

[1] Displaying Previous Screen
It returns to the previous screen(Content Details Screen).

[2] Displaying Information Screen
The Information Screen is displayed. You can refer to information on how to use this screen(Content Edit Screen).

[3] Adding/Deleting Checkmark
The checkmark is added/deleted for the Content Item (See the Content Details Screen).

[4] Deleting Content Item
The Content Item is deleted.

[5] Adding Content Item
A new Content Item is created and added.

[6] Initializing Speaking Function
The speaking function is initialized. It can be used when the speaking function is out of order.

[7] Listening to Content Item
The original part of the Content Item is spoken with the Confirmation Voice (See the Settings Screen).

[8] Displaying Previous Item
The previous Content Item is displayed. The left end of the slider shows the number of the current item.

[9] Displaying Any Item
Any Content Item is displayed. You can move the slider to jump to the item.

[10] Displaying Next Item
The next Content Item is displayed. The right end of the slider shows the total number of all items.

[11] Editing Original Content
The keyboard appears. You can edit the original content. You can also edit by copying and pasting. The original content is played(spoken).

[12] Finishing Editing
The keyboard disappears.

[13] Editing Translated Content
The keyboard appears. You can edit the translated or memo content. You can also edit by copying and pasting. The translated content is not played(spoken).

Speaking Scenario Screen

[1] Displaying Previous Screen
It returns to the previous screen(Home(Spoken Content) Screen).

[2] Displaying Information Screen
The Information Screen is displayed. You can refer to information on how to use this screen(Speaking Scenario Screen).

[3] Listening to Scenario
You can listen to this Speaking Scenario trially. The Confirmation Text (See the Settings Screen) is spoken according to the scenario.

[4] Choosing Scenario
This Speaking Scenario is chosen as the Speaking Scenario when playing(speaking) Spoken Contents. Only one Speaking Scenario can be chosen.

[5] Deleting Scenario
The delete action appears for this Speaking Scenario. You can delete the scenario.

[6] Editing Scenario
The edit action appears for this Speaking Scenario. You can display the Scenario Details Screen for the scenario. You can also directly display the Scenario Details Screen.

[7] Adding Scenario
For a new Speaking Scenario, the Scenario Details Screen is displayed. You can create and add the scenario.

[8] Sorting Scenario
The order of this Speaking Scenario is changed. You can sort the scenario.

[9] Initializing Speaking Function
The speaking function is initialized. It can be used when the speaking function is out of order.

Scenario Details Screen

[1] Displaying Previous Screen
It returns to the previous screen(Speaking Scenario Screen).

[2] Displaying Information Screen
The Information Screen is displayed. You can refer to information on how to use this screen(Scenario Details Screen).

[3] Editing Scenario Name
The keyboard appears. You can edit the name of the Speaking Scenario. The keyboard can disappear with the done key or swipe down.

[4] Listening to Scenario
You can listen to the Speaking Scenario trially. The Confirmation Text (See the Settings Screen) is spoken according to the scenario.

[5] Adding Utterance
For a new Utterance, the Utterance Screen is displayed. You can create and add the utterance.

[6] Listening to Utterance
You can listen to this Utterance trially. The Confirmation Text (See the Settings Screen) is spoken according to the utterance.

[7] Adding/Deleting Apply Mark
The apply mark is added/deleted for this Utterance. You can add/delete a mark indicating that the utterance is temporarily excluded. Utterances with the apply mark deleted are excluded from Playing(Speaking) according to a Speaking Scenario.

[8] Deleting Utterance
The delete action appears for this Utterance. You can delete the utterance.

[9] Editing Utterance
The edit action appears for this Utterance. You can display the Utterance Screen for the utterance. You can also directly display the Utterance Screen.

[10] Sorting Utterance
The order of this Utterance is changed. You can sort the utterance. Speaking according to a Speaking Scenario is performed in order from the lower Utterance to the upper Utterance.

[11] Initializing Speaking Function
The speaking function is initialized. It can be used when the speaking function is out of order.

Utterance Screen

[1] Displaying Previous Screen
It returns to the previous screen(Scenario Details Screen).

[2] Displaying Information Screen
The Information Screen is displayed. You can refer to information on how to use this screen(Utterance Screen).

[3] Adding/Deleting Apply Mark
The apply mark is added/deleted for the Utterance (See the Scenario Details Screen).

[4] Contents of Utterance
The contents of the Utterance are displayed. The upper row indicates the Voice to Utter, and the lower row indicates R (Rate), P (Pitch), V (Volume), and D (Delay) related to the utterance.

[5] Listening to Utterance
You can listen to the Utterance trially. The Confirmation Text (See the Settings Screen) is spoken according to the utterance.

[6] Voice to Utter
This is the Voice to Utter item.

[7] Choosing Voice to Utter
The Voice to Utter Screen is displayed. You can choose the voice to utter.

[8] Listening to Each Item of Utterance
You can listen to each item related to the Utterance trially.

[9] Utterance Rate
This is the rate item related to the Utterance.

[10] Decreasing Number
You can decrease the number by 0.01.

[11] Specifying Number
You can jump to specify the number.

[12] Increasing Number
You can increase the number by 0.01.

[13] Initializing Speaking Function
The speaking function is initialized. It can be used when the speaking function is out of order.

[14] Utterance Pitch
This is the pitch item related to the Utterance.

[15] Utterance Volume
This is the volume item related to the Utterance. Volume can be lowered.

[16] Utterance Delay
This is the delay item related to the Utterance. Delay allows you to pause between Utterances.

Voice to Utter Screen

[1] Displaying Previous Screen
It returns to the previous screen(Utterance Screen).

[2] Displaying Information Screen
The Information Screen is displayed. You can refer to information on how to use this screen(Voice to Utter Screen).

[3] Choosing Voice
This voice is chosen as the Voice to Utter. Only one voice can be chosen. Voices with the ‘enhanced’ label speak better than voices without.

[4] Listening to Voice
You can listen to this voice trially. The Confirmation Text (See the Settings Screen) is spoken with the voice.

[5] Initializing Speaking Function
The speaking function is initialized. It can be used when the speaking function is out of order.

Language to Speak Screen

[1] Displaying Previous Screen
It returns to the previous screen(Home(Spoken Content) Screen).

[2] Displaying Information Screen
The Information Screen is displayed. You can refer to information on how to use this screen(Language to Speak Screen).

[3] Listening to Language
You can listen to this language trially.

[4] Choosing Language
This language is chosen as the Language to Speak. Only one language can be chosen for learning by listening. Once chosen, there is usually no need to change it.

[5] Initializing Speaking Function
The speaking function is initialized. It can be used when the speaking function is out of order.

Settings Screen

[1] Displaying Previous Screen
It returns to the previous screen(Home(Spoken Content) Screen).

[2] Displaying Information Screen
The Information Screen is displayed. You can refer to information on how to use this screen(Settings Screen).

[3] Specifying Automatic
When a Spoken Content is played(spoken), it specifies whether to start speaking automatically by ON/OFF.

[4] Specifying Target
When a Spoken Content is played(spoken), it specifies whether to target checkmark-added Content Items within the content.

[5] Specifying Order
When a Spoken Content is played(spoken), it specifies the order in which Content Items within the content are spoken.

[6] Specifying Rewind
It specifies the number of characters to rewind.

[7] Specifying Cut Out
It specifies the number of characters to cut out.

[8] Initializing Speaking Function
The speaking function is initialized. It can be used when the speaking function is out of order.

[9] Editing Confirmation Text
The Confirmation Text edit screen is displayed. You can change the Confirmation Text. The Confirmation Text is also used as the text of ‘Spoken Content (Example)’.

[10] Listening to Confirmation Text
You can listen to the Confirmation Text trially. The current Confirmation Text is spoken with the Confirmation Voice.

[11] Editing Confirmation Voice
The Confirmation Voice edit screen is displayed. You can change the Confirmation Voice. The Confirmation Voice is also used as the voice of ‘Speaking Scenario (Example)’.

[12] Listening to Confirmation Voice
You can listen to the Confirmation Voice trially. The Confirmation Text is spoken with the current Confirmation Voice.

[13] Methods of Other Settings
It can be set by the following operation. However, it may differ depending on the version of iOS/iPadOS.

[Increase Voices]
Device’s ‘Settings’ app -> [Accessibility] -> VISION[Spoken Content] -> [Voices] -> (Language choice) -> (Regional voices of language)
(This setting does not always add Voices to Utter.)

[Make Text Larger]
Device’s ‘Settings’ app -> [Display & Brightness] -> [Text Size] -> (Bottom slider)

[Turn on Dark Mode]
Device’s ‘Settings’ app -> [Display & Brightness] -> APPEARANCE[Dark]
(You can also set it from the Control Center.)

Purchase Screen

[1] Displaying Previous Screen
It returns to the previous screen(Home(Spoken Content) Screen).

[2] Displaying Information Screen
The Information Screen is displayed. You can refer to information on how to use this screen(Purchase Screen).

[3] Purchasing Ad Product
The purchase procedure for the Ad Product begins. When the purchase procedure is completed successfully, ‘Purchased’ is displayed.

[4] Purchasing Spoken Content Product
The purchase procedure for the Spoken Content Product begins. When the purchase procedure is completed successfully, ‘Purchased’ is displayed.

[5] Purchasing Speaking Scenario Product
The purchase procedure for the Speaking Scenario Product begins. When the purchase procedure is completed successfully, ‘Purchased’ is displayed.

[6] Restoring Purchased Products
Your purchased products are restored. It can be used when the purchased products have returned from ‘Purchased’ to ‘Purchase’ due to reinstallation, model change, etc.